How to Make Handmade Candles for Cozy Evenings?
There’s something magical about the warm glow of a candle that instantly creates a cozy and inviting atmosphere. If you’re looking to add a personal touch to your home decor and create a soothing ambiance, why not try making your own handmade candles? Not only is it a fun and creative activity, but it also allows you to customize the scent, color, and style of your candles to suit your preferences. In this article, we’ll guide you through the process of making handmade candles that will make your evenings even more special.
Choosing the Right Materials
Before you dive into the world of candle making, it’s important to gather all the necessary materials. To make your own candles, you’ll need:
1. Wax: Choose a high-quality wax, such as soy wax or beeswax, which burn cleaner and longer than traditional paraffin wax.
2. Wick: Select a wick that is appropriate for the size of your candle. You can choose between cotton or wooden wicks, depending on your preference.
3. Fragrance: If you want scented candles, opt for fragrance oils specifically designed for candle making. Be sure to choose scents that complement the mood you want to create.
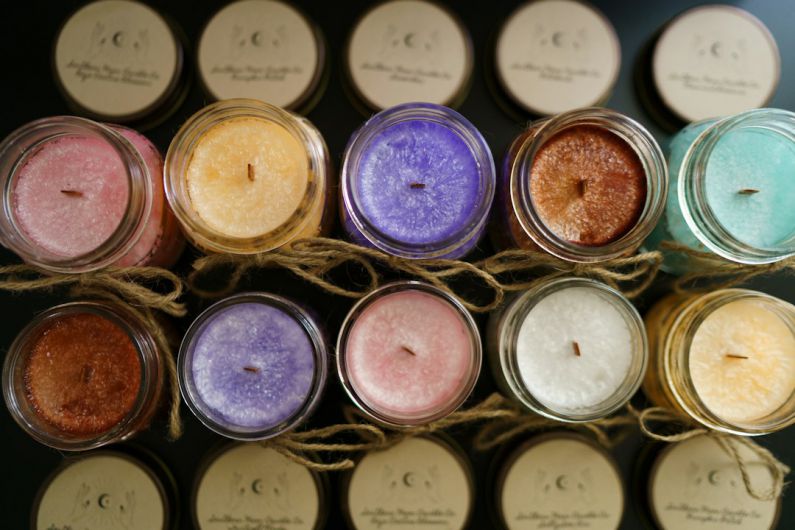
4. Colorants: To add a pop of color to your candles, you can use liquid or solid dyes specifically made for candles. Experiment with different shades to create unique combinations.
5. Containers: Choose heat-resistant containers, such as glass jars or tins, to pour your melted wax into.
Preparing the Wax and Wick
Start by melting the wax in a double boiler or a microwave-safe container. If you’re using a double boiler, fill the bottom pot with water and place the wax in the top pot. Heat the water gently until the wax is completely melted. If using a microwave, heat the wax in short bursts, stirring in between, until it is fully melted.
While the wax is melting, prepare your wick. Cut it to the desired length, leaving a few inches extra for trimming later. Attach the wick to the bottom of your container using a wick sticker or a small dab of melted wax. Make sure the wick is centered and straight.
Adding Fragrance and Color
Once the wax is melted, it’s time to add fragrance and color. Stir in the fragrance oil or essential oil of your choice, following the recommended guidelines for the amount to use. If you want to add color, slowly add the dye, a little at a time, until you achieve your desired shade. Stir well to ensure the color is evenly distributed throughout the wax.
Pouring and Setting
Now that your wax is scented and colored, it’s time to pour it into your containers. Slowly and carefully pour the melted wax into the prepared containers, ensuring that the wick remains centered. Leave a small gap at the top to allow for expansion during cooling.
Allow the candles to cool and set completely for several hours or overnight. Once the wax is solidified, trim the wick to about a quarter of an inch to ensure a clean and even burn.
Enjoying Your Handmade Candles
Now that your handmade candles are ready, it’s time to light them up and enjoy the cozy ambiance they create. Place them in your favorite spots around the house, such as the living room, bathroom, or bedroom, and let their soft glow relax and rejuvenate you.
Remember to always follow safety guidelines when burning candles. Never leave them unattended and keep them away from flammable materials.
In conclusion, making handmade candles is a wonderful way to add a personal touch to your home decor and create a cozy atmosphere. With a few simple steps and the right materials, you can create beautiful candles that reflect your unique style and preferences. So why not give it a try and elevate your evenings to a new level of comfort and warmth?